Tips & Tricks for Climbers
I am a member of the
Association of Mountaineering Instructors,
the professional body for UK climbing Instructors. I hold the top award, the
WMCI (formerly MIC). This page has some wee tips and tricks I have picked up over the years
but is not in any way a complete instruction
manual on how to climb safely, just some neat and/or amusing ideas. A
knowledge of basic techniques and basic knots, including knots such as clove-hitches, figure-8's and
sheet bends will be necessary to understand this page I didn't invent
any of these tips and tricks myself, I'm just passing them on.
Warning Any new climbing or rope-work technique, including all of those
featured here, should be practised in a controlled and safe environment
first, and tested in a variety of circumstances, particularly when "loaded"
or "fallen-on". I would suggest either low down on a climbing wall with big safety mats beneath
you, or at an outdoor venue with a very good landing such as a soft sandy beach. And
better to have a companion (and a knife) with you in case you get yourself hung up in an
inescapable position! Only when you are completely familiar with the pro's
and con's of a technique should you consider using it in earnest.
Warning
General Ropework
Winter Stuff
Odds & Ends
The Twin
Summits Paradox (opens a new page)
High Altitude Tips & Tricks (opens
a new page)
Within these categories the tips and tricks are
in no particular order.
General Ropework
|
| |
Description |
Pros and Cons |
|
|
|
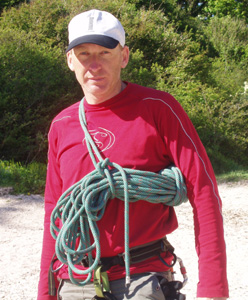 |
Handbag CarryIt may sound like bad news for all those macho types, but
this is a good alternative to the standard 'rucksack style' rope carry. The rope
is lap coiled the usual way then just tied to your body differently. Use a
sheet bend or stopper knot. If
you have two ropes tie one on either side. |
Particularly good when descending gullies etc. as
the loops of the rope don't hang behind your back, dragging through the mud,
and catching on, or
dislodging, rocks. |
 |
Cord SawA short (30cm) piece of thin (2-3mm) nylon cord can cut a
loaded rope in just 3 seconds. This is like the piece of cord I use for my
chalk-bag. In very rare circumstances, e.g. crag rescue, it may be necessary to
cut a loaded rope to escape the system, and this is one way to do it without a
knife.
This is also a very impressive demonstration of how quickly nylon moving on
loaded nylon will cut through. You'll never look at a used abseil sling the
same way again. Try it and be amazed.
|
Only works on a loaded rope.
Doesn't always cut the last strands cleanly.
Gives a slower release of the load compared to a
knife cut. |
|
|
|
|
|
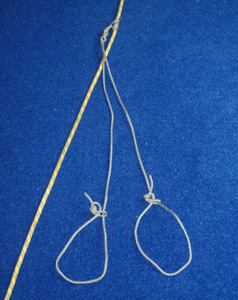 |
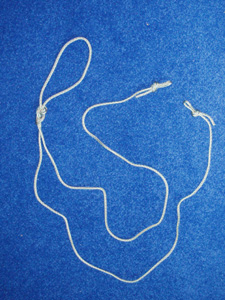
American Prussik systemAn alternative leg system for prussikking, which
uses marginally more cord but seems to me to be a lot more efficient in most situations.
It provides you with a single strand of cord for each foot, rather than a
loop for just one foot. Make one by tying a figure-8 knot in the centre of
a roughly 2m length of 5- 6mm cord, leaving at the top of the fig-8 knot a
loop big enough to tie the line to the rope with a standard prussik knot. At the foot
of each single strand tie a small overhand knot, you can then use this knot
to quickly larksfoot one of your feet into each strand. The 'waist' or 'body' prussik used in this system
remains the same. This technique I first saw many years ago in Andy Selters
Crevasse Rescue book. |
Uses marginally more cord... so slightly heavier.
More secure footing when prusikking.
Less swivelling and spinning when using this system free
hanging. With practice and flexibility a much larger
'fetch' can be achieved on each cycle. |
|
|
|
|
|
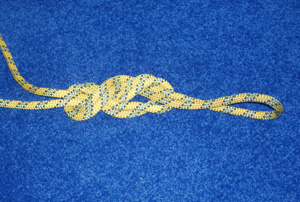 |
Fig-9 knotThe figure-9 knot, tied by adding one more twist to
a figure-8 on the bight, is supposedly stronger than the figure-8 and
is certainly much easier to un-do after it's been loaded. Good for using in
anchors that will be used for multiple abseils, bottom-roping, or similar. |
Stronger than figure eight in theory.
Easier to un-do after it's been loaded. |
|
|
|
|
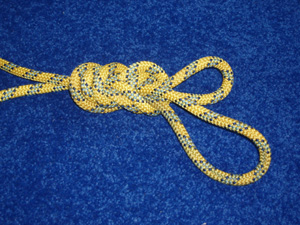 |
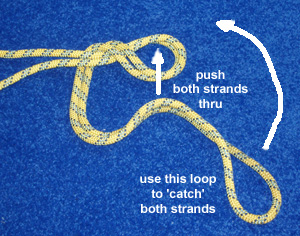
Fig-8 two-loops knotThe "figure-8 two-loops knot" is a great knot for
use when setting up bottom-rope systems.
Tie it as follows. Start the same way as a figure
of eight on the bight, but instead of putting the last bight through the
last loop, push the two strands of this bight through the loop, then 'catch'
them with the bight itself. Better still, get some-one who knows how to tie
one of these knots to show you!! |
Tricky to learn to tie Provides two semi-independent loops for belaying or
similar. Provides a back-up anchor attachment in bottom-roping systems etc. if you also use a separate karabiner in each loop. |
|
| |
|
Winter & Wild Stuff
|
| |
Description |
Pros and Cons |
|
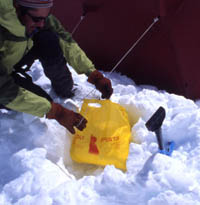
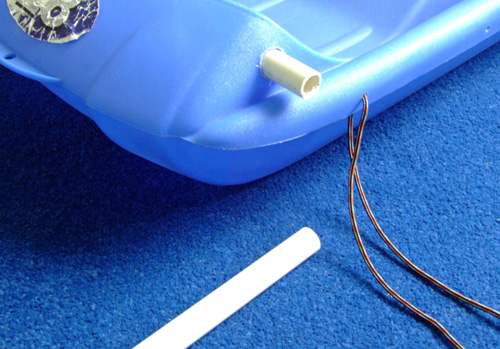
Plastic Bag Snow Anchor
When camping on snow. For tents only...not for climbing.!!
In my opinion this makes as good an anchor for your tent in most
conditions as any commercially available 'snow-peg'. Just dig a hole,
filling a plastic bag with the snow that comes out of the hole, tie the bag
to your guy line, drop it back in the hole and then cover everything with snow.
This particular anchor was kindly supplied by
Needlesports, circa 2005.
|
Very few snow conditions seem to really suit manufactured 'snow-pegs'.
Multi-use. You really need to carry a shovel with you to dig the hole and fill the
bag.
Very lightweight and cheap. |
|
|
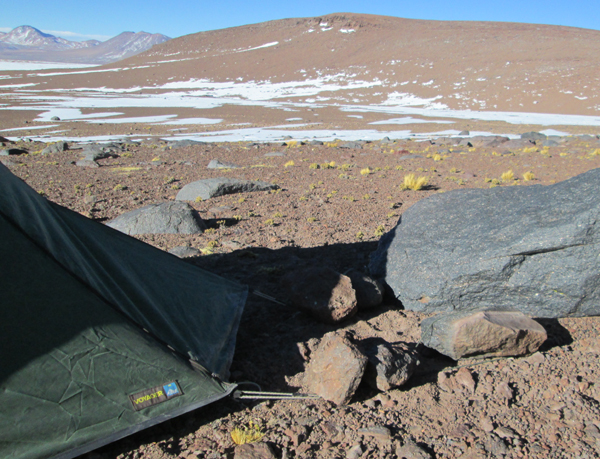
Rock Guys
Rock guys made with 3mm or 4mm paracord (tied to the tent elastics) and
used to pitch a Terra Nova Quasar in Chile. Note that it is important to
place the rocks in such a way that you keep the edge of the flysheet low to
the ground, to prevent wind getting underneath the tent... but also DON'T
put rocks directly against the tent fabric or the poles, because this will
lead to very rapid wear and tear!
When unattended during the day you can also weigh the inner tent down
with rocks to prevent the wind getting under the base of the tent. But again make
absolutely sure there is no contact with the tent fabric (use a foam mat) |
Lighter weight and harder wearing than having
valances on your tent. However not as effective as valances at
preventing wind from getting in underneath the tent. |
|
|
|
|
 |
Home Made Pulk
Ask me for details of how to quickly convert a kiddies sledge into something you
can tow across the snow. |
Much cheaper and lighter than professional
pulks, and fine for small scale use on trips of up to one or two weeks. |
|
|
|
|
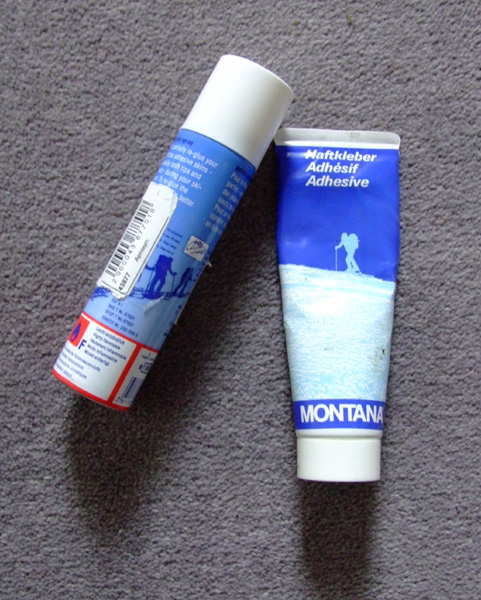 |
Yeti Gaiter Fix
Tired of your yeti or supergaiters popping off your boots at the toe? The answer is
to glue them on, but the common trick of using superglue makes them very
hard to remove. The best answer I have found is to use skin glue, as used by
ski-mountaineers for attaching their skins to their skis, with brands such as Coll-tex or Montana. |
Doesn't trash your
supergaiters when you need to remove them.
Works well in wet environments. |
Odds & Ends
|
| |
Description |
Pros and Cons |
|
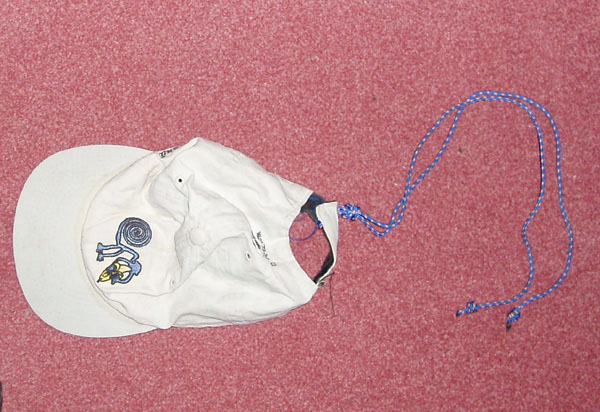
Hat Catchers
I got this one from a skier - but it works well on windy days when you
want a sun-hat on. Tie a short length of 3mm or 4mm cord to the back of your hat, the
other end can be tied or clipped to your rucksack. Or it usually works fine just with a
knot in the ends stuffed under your jacket or tucked into a pocket. Never lose a hat in the wind or
while downhill skiing again..
|
A great way of carrying some spare cord too.!.
|
|
|
|
|
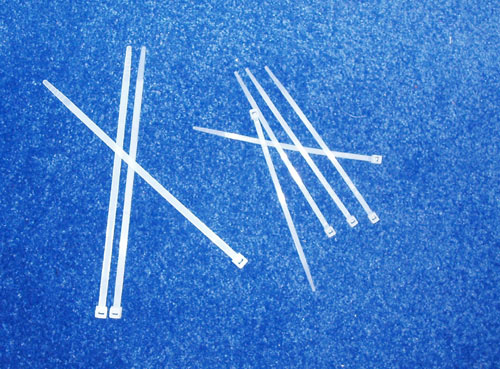 |
Cable Ties
The best all round repair kit - I've mended everything from snowboard
bindings to crampons with these - the snowboard lasted for two weeks as
well.
Also useful for sealing zips on bags before taking a flight, etc. Not as secure as
a padlock but at least there is no key to lose. |
|
|
|
|
|
|
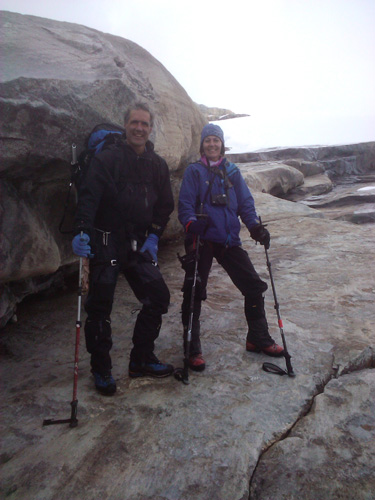 |
Upside Down Poles
You probably shouldn't be using your poles on glacier-polished granite
slabs at all....
.....but if you are at high altitude and really need them for support then turn them upside down!
Big rubber handles
give much better grip than small pointy metal bits.! |
|
See also High Altitude Tips & Tricks (opens
a new page)